Running commands in AutoCAD is very easy. Simply activate the command you need and then follow the prompts that appear on the command line.
In this article, we will learn some common ways to activate commands in AutoCAD and how to select options from the command line.
A. Activating Commands
There are three common ways to activate commands in AutoCAD: through the Ribbon, the Menu Bar, and the Command Line. If you don’t know where these parts are, click here.
1. Activating commands from the Ribbon Panel
To activate commands from the Ribbon Panel, simply find the command icon you need and click on it to activate the command.
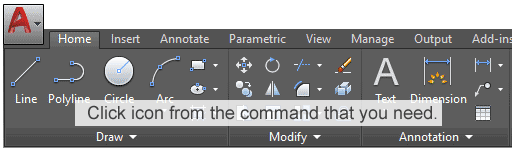
Frequently used commands are usually located on the Home tab. The icon for each command will be shown in its corresponding explanation in later articles.
2. Activating commands from the Menu Bar
The Menu Bar is a row of menus containing commands grouped by function.
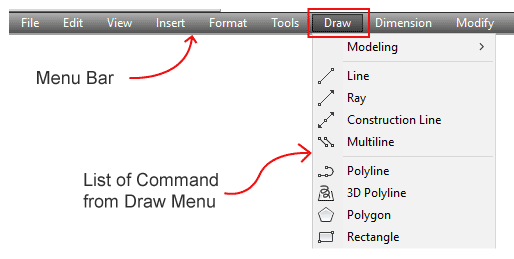
To activate commands from the Menu Bar, simply click one of the menus and then click the command you want to use. The command will be activated.
Frequently used commands are found in the Draw, Modify, and Dimension menus.
- The Draw menu contains commands for creating drawings, such as Line and Circle.
- The Modify menu contains commands for modifying drawings, such as Trim and Rotate.
- The Dimension menu contains commands for creating dimension lines, such as DIMLINEAR and DIMANGULAR.
Note: By default, the Menu Bar is only displayed in the AutoCAD Classic workspace. However, if you want to display it in other workspaces, simply type MENUBAR in the Command Line and press Enter. Then, change the value to 1 (type 1 and press Enter).

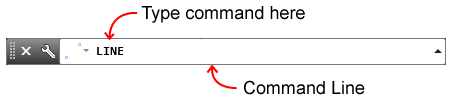
3. Activating commands from the Command Line
To activate commands from the command line, simply type the name of the command you need, and then press Enter.
Most commands have shortcuts consisting of just one or a few letters. For example, the shortcut for the LINE command is the letter L. You can type LINE in full or simply type L to activate the LINE command.
Other command shortcuts will be explained in later articles.
B. Prompts
A prompt is a message or question that appears on the command line to guide you while executing a command.
For example, if you activate the LINE command, the following prompt will appear: “specify first point“. So, click in the drawing area to specify the starting point of the line you want to create.
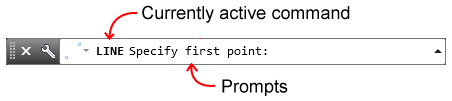
After specifying the first point, the “specify next point” prompt will appear.
Likewise, when using other commands, prompts will appear to guide you through the process. For beginners, it is very important to look at the prompts when running commands.
C. Selecting Options from the Command Line
Some AutoCAD commands display options on the command line. Some options allow you to choose a method, while others let you specify additional parameters.
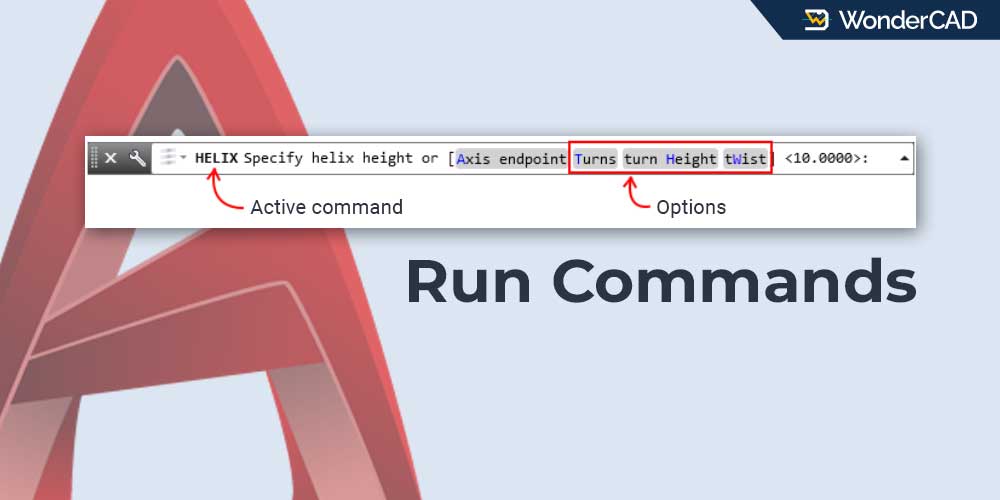
Examples are shown in the image below:

The first example shows the CIRCLE command in use. This command displays several methods for creating a circle. You can choose the method that best suits your needs.

The second example shows the HELIX command in use. This command displays several options for specifying helix parameters. You can specify these parameters as needed or skip them.
There are two ways to select options from the command line:
- Hover the cursor over an option and click it to select it.
- Type the capitalized letter shown in the option, then press Enter.
D. Entering Values in the Command Line
When executing commands in AutoCAD, you often need to enter values such as coordinates and scale factors. When entering these values, use a period (.) as the decimal separator and commas (,) to separate X, Y, and Z coordinates.
Example:
- A value of one-half is entered as 0.5.
- Coordinates with X = 10, Y = 5.5, and Z = 3.5 are entered as 10,5.5,3.5.
Leave a Reply