AutoCAD can be used immediately after installation without any additional configuration. However, there are a few things that are usually adjusted to suit the user’s needs or convenience.
Common adjustments include setting a default drawing template, configuring drawing units, choosing a default save format, selecting a workspace, changing the drawing area background color, and adjusting the crosshair size.
Below is an explanation of each setting:
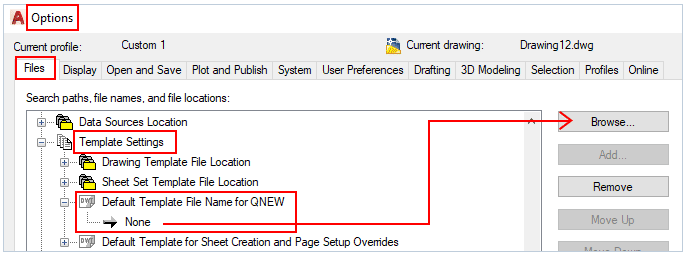
A. Setting a default Drawing Template
A drawing template is a drawing file that contains predefined settings such as layers, dimension styles, and layout formats complete with title blocks, and is saved in the DWT file format.
By using a drawing template, you don’t need to reconfigure these settings every time you create a new drawing.
You can specify the default template in the Options dialog box by going to Files > Template Settings > Default Template File Name for QNEW.
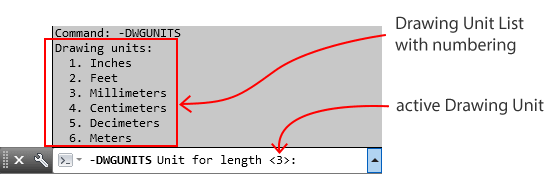
B. Set Drawing Units
If you’ve started a drawing using a template that meets your requirements, as explained in the previous article, you may not need to change the drawing units.
However, if necessary, you can change the drawing units at any time. Here’s how:
Type -DWGUNITS on the command line and press Enter. A list of available drawing units will appear. The number shown in parentheses indicates the currently active drawing unit.
Enter the number corresponding to the unit you want to use, then press Enter several times until the command is complete.
C. Default Save Format
If you work with a team that still uses older versions of AutoCAD, you may need to set the default save format to an earlier DWG version. This helps ensure compatibility, allowing your drawings to be opened by users who are using older versions of AutoCAD.
To configure this setting, follow these steps:
- Open the Options dialog box (right-click in the drawing area and select Options).
- Select the Open and Save tab.
- In the File Save section, click the Save As dropdown list and choose the file format that meets your requirements (for example, AutoCAD 2010 Drawing).
- Click Apply, then click OK to save the changes.
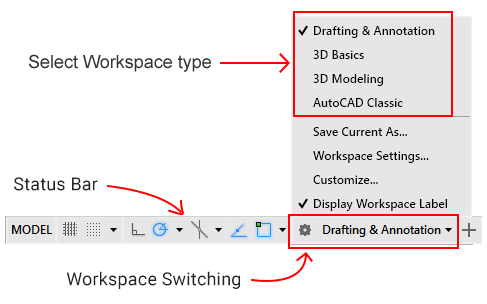
D. Select a Workspace
AutoCAD provides several workspace options that you can choose from based on your needs, including Drafting & Annotation, 3D Basics, 3D Modeling, and AutoCAD Classic. Each workspace displays a different set of command panels on the Ribbon.
In general, choose the Drafting & Annotation workspace for 2D drawings, the 3D Basics workspace for basic 3D drawings, and the 3D Modeling workspace for more complex 3D drawings.
If you prefer a clean and lightweight interface, you can choose the AutoCAD Classic workspace. However, this workspace may no longer be available in newer versions of AutoCAD.
The easiest way to switch workspaces is by using the Workspace Switching button on the status bar at the bottom of the drawing area.
Simply click the Workspace Switching button, then click the name of the workspace you want to use.
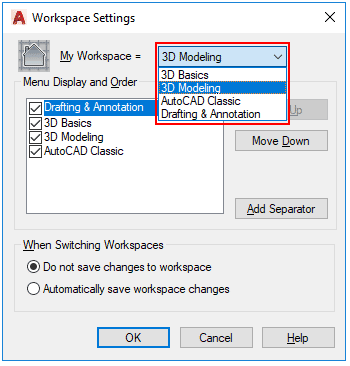
Alternatively, you can also change the workspace type by typing the WSSETTING command in the command line and then pressing Enter. The Workspace Settings dialog box will appear.
Click the dropdown menu to the right of My Workspace and select the workspace type you want to use. Click OK to save your changes and close the dialog box.
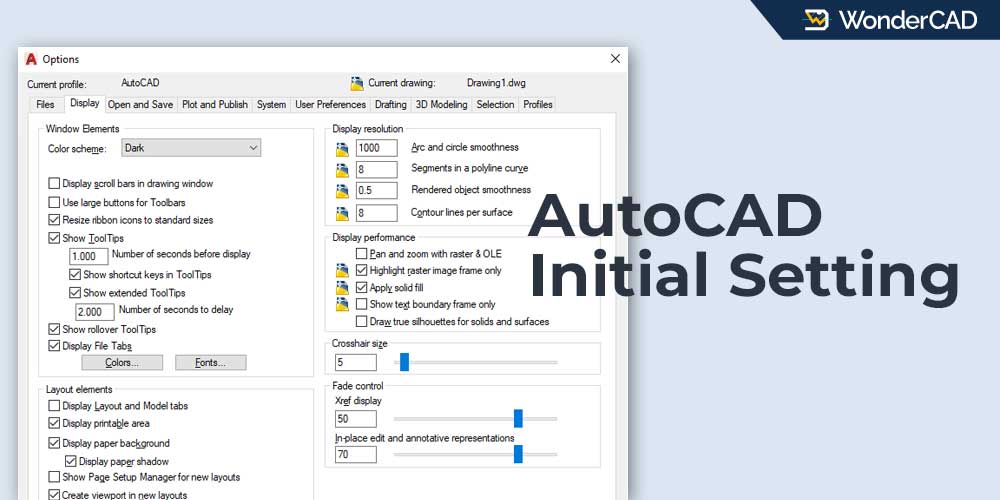
E. Change the Drawing Area Background Color
You can change the drawing area background color to suit your preference. This may depend on your working environment, whether indoors or outdoors.
To change the background color in AutoCAD, follow these steps:
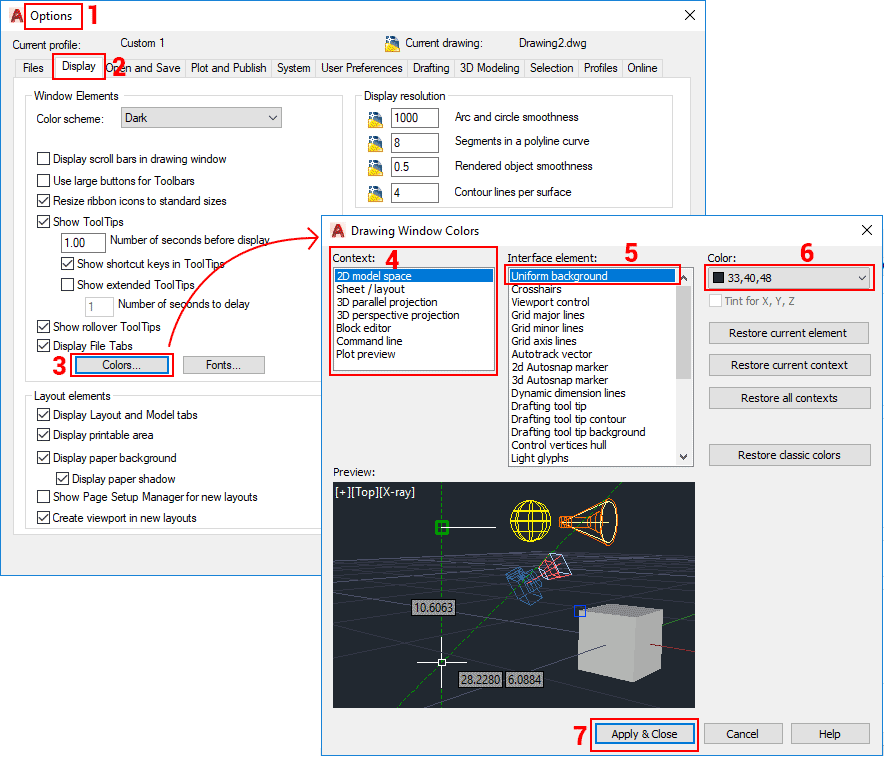
- Open the Options dialog box. To do this, right-click in the drawing area and select Options.
- Select the Display tab.
- In the Window Elements panel, click the “Colors…” button. This will open the “Drawing Window Colors” dialog box.
- In the Context box, select the context whose background color you want to change.
- In the Interface Element box, select Uniform Background.
- Click the Color dropdown list and select the desired color.
- Click Apply & Close to save the changes and close the Drawing Window Colors dialog box.
- Finally, click OK to close the Options dialog box.
For more details, see the image below:
To restore the original background color, repeat the steps above until you reach Step 5, then click Restore Current Element, followed by Apply & Close. Alternatively, click Restore All Contexts to restore all contexts to their default colors.
F. Adjusting the Crosshair Size
You can adjust the crosshair size to suit your preference. Here’s how:
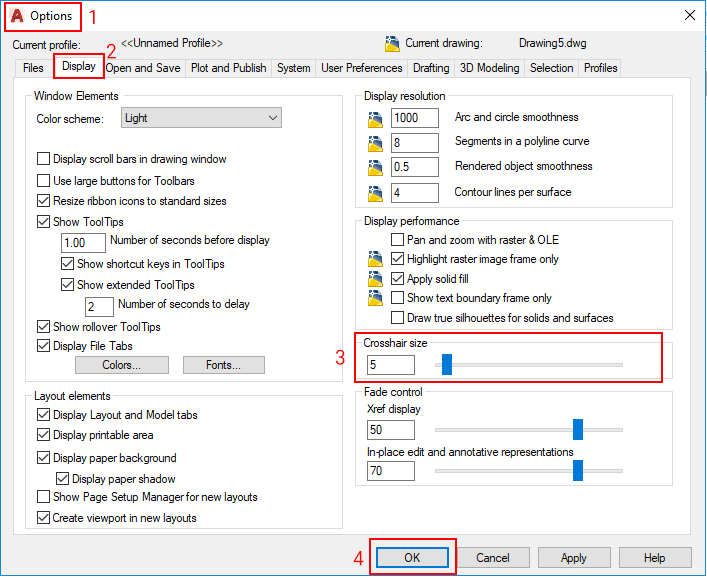
- Open the Options dialog box. To do this, right-click in the drawing area and select Options.
- Select the Display tab.
- Change the value in the Crosshair Size box or move the slider to the right or left as needed.
- Click OK.
For more details, see the image below:

Leave a Reply