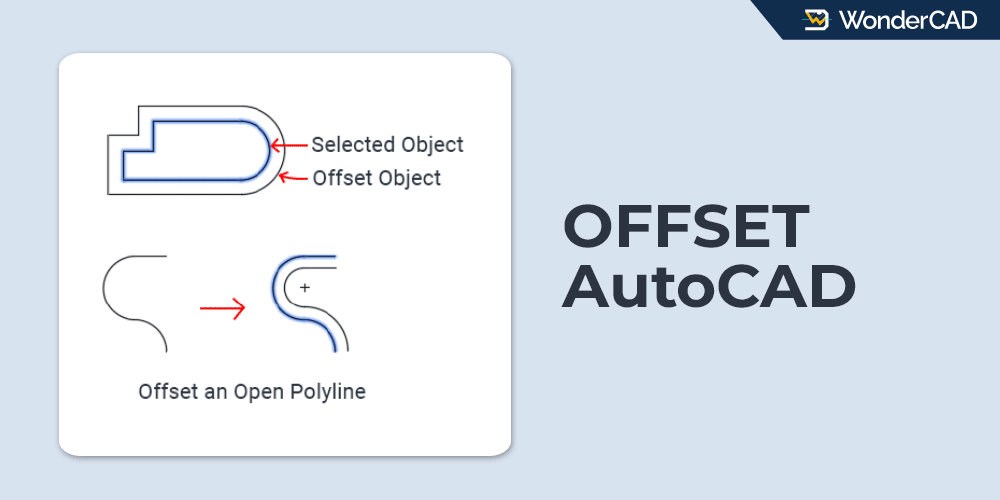
In this article, you’ll learn what the OFFSET command does and how to use it in AutoCAD.
The OFFSET command allows you to create parallel objects, including parallel lines, parallel curves, and concentric circles.
The icon and keyboard shortcut for the OFFSET command are shown in the table below.
| Command | OFFSET |
| Function | Creates a parallel copy of the selected object at a specified distance. |
| Icon |  (New) (New) (Old) (Old) |
| Shortcut | O |
The OFFSET command is one of the most commonly used commands in the Modify group. You can start the OFFSET command by clicking its icon in the Modify panel on the Ribbon.
If your workspace displays the Menu Bar, you can also access the OFFSET command from the Modify menu.
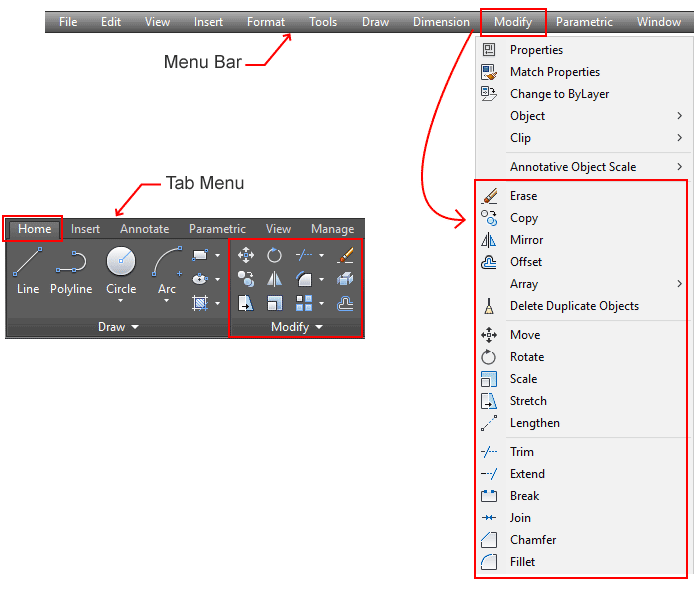
If you prefer using the Command Line, simply type O and press Enter to start the OFFSET command.
A. OFFSET Methods
With the default method, when you run the OFFSET command, you’ll be prompted to specify the offset distance, select an object, and click the side where you want to place the offset object.
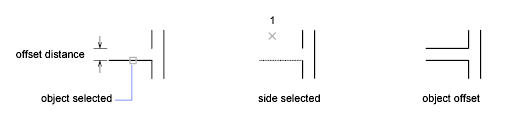
If you don’t want to specify an offset distance, you can choose the Through option from the Command Line. This option lets you place the offset object wherever you need.
You can click anywhere in the drawing area or snap to a reference point on another object, and the offset object will be created at that location.

If you want to place the offset object at a reference point on an existing object, make sure OSNAP is enabled so the placement is always accurate.
B. How to Use the OFFSET Command in AutoCAD
To use the OFFSET command with the default method, follow the steps below.
- Start the OFFSET command.
- Enter the offset distance, then press Enter.
- Select the object to offset.
- Move the cursor to the desired side of the object.
- Click to create the offset object.
If you want to offset an object without specifying the offset distance, follow the steps below.
- Start the OFFSET command.
- Type T to select the Through option, then press Enter.
- Select the object to offset.
- Click anywhere in the drawing area or snap to a reference point on another object.
- Click again to create another offset object, or press Enter to finish the command.
Note :
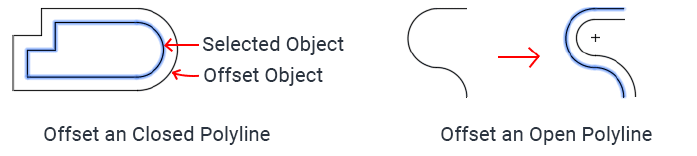
When you offset a closed polyline, all of its segments are offset together, and the resulting object remains closed with no open endpoints. Although each segment is parallel to its corresponding segment on the source object, the corners are not aligned because the offset distance is measured perpendicular to each segment.
When you offset an open polyline, some segments may become longer while others become shorter. However, the first and last segments remain parallel to those of the source object because the polyline has open ends.
C. Prompts and Options
When you run the OFFSET command, you may see the following prompts and options in the Command Line. Here’s what each one does.
- Specify offset distance: Enter the offset distance.
- Select object to offset: Select the object you want to offset.
- Specify point on side to offset: Move the cursor to the desired side of the object, then click to create the offset object.
- Exit: Ends the OFFSET command.
- Undo: Reverses the previous offset operation.
- Multiple: Creates multiple offset objects using the same offset distance.
- Through: Creates an offset object by specifying its placement point instead of entering an offset distance.
- Erase: Deletes the original object after creating the offset object.
- Layer: Controls which layer the offset object is created on.
- Current: Places the offset object on the current layer.
- Source: Places the offset object on the same layer as the source object.
Leave a Reply